


This tutorial shows you the way to add the latest MySQL JDBC driver to Eclipse. The same steps can be followed to add any other JDBC drivers to Eclipse.
Step 1:
Download and extract the platform-independent MySQL JDBC connector, from the official site.
Step 2:
Copy the mysql-connector-java-xxx-bin.jar file to any desired folder.
Step 3:
Go to the Window → Preferences in Eclipse.


Step 4:
Expand the Data Management → Connectivity → Driver Definitions and click on the Add button.


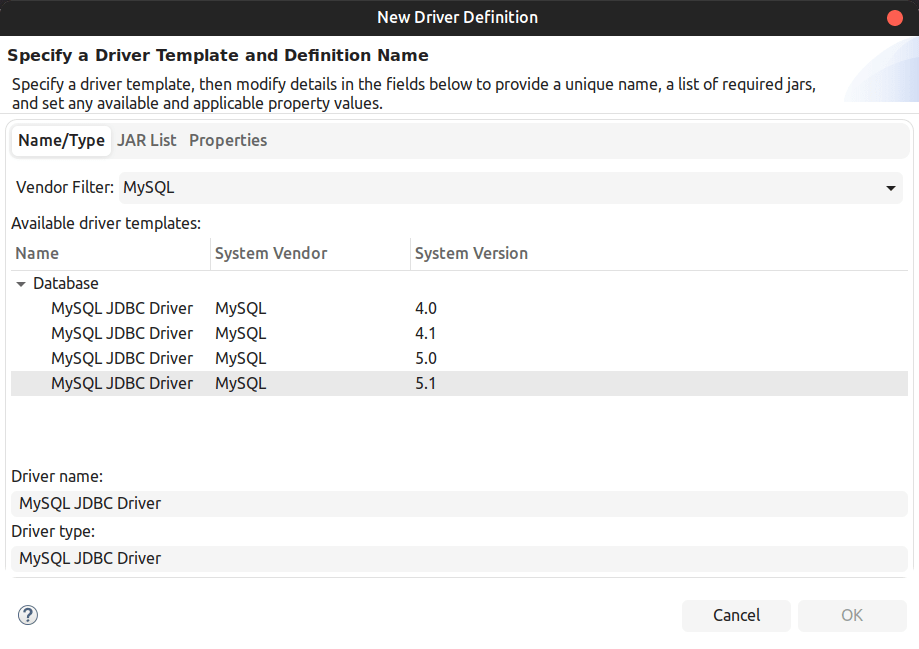
Step 5:
In the appeared New Driver Definition dialog, select MySQL in the vendor filter combo box and select the latest MySQL JDBC Driver from the listed drivers. Even if you have downloaded MySQL JDBC Driver 8, you can still select System Version 5.1.

Step 6:
Once you have selected the MySQL JDBC Driver, switch to the JAR List tab.


Step 7:
Click on the “Add JAR/Zip” button or select the existing driver if available and click on the “Edit JAR/Zip” button.
Step 8:
Browse and select the JDBC connector JAR file and click OK.

Step 9:
Double-check the added driver in the list of available driver definitions and click “Apply and Close”.

If you find this article useful or if you have any questions please comment below. Finding it helped someone, motivates me to write more. I will also try my best along with the Java Helps community to help solve your issues.


